Beginner Bass Base: Note Names – Part 2 (Descending Groove)

MASTER BASS EDUCATOR PATRICK PFEIFFER HELPS BUILD EVERY ELEMENT OF YOUR PLAYING WITH HIS BEGINNER BASS BASE COLUMN
By Patrick Pfeiffer
ORIGINALLY POSTED IN BASS MAGAZINe, July 2019
Any time someone asks you to play a major scale, where do you start? In all likelihood on the low root, playing the notes in ascending order from the lowest to the highest. Right? Same for a groove.
However, it’s just as important to be able to start your scales and grooves at the top, on the upper root, and structure them from high to low. Just listen to the opening bass line of Stevie Wonder’s “I Wish” or the Eagles’ chorus in “Hotel California,” and you realize that these types of grooves are incredibly catchy exactly because they defy expectation -- they move from high to low instead of the other way around.
Which brings us to this month’s column, the second part of the lesson on how to find your way among the notes on your bass neck: Using a descending groove to learn the notes.
When it comes to playing a groove, you want to group your notes close together. You group your notes so as to reach all of them with ease and with a minimum of motion…and it certainly is much more interesting to use a real groove as a learning tool for finding the notes on the neck.

Fig. 1
Fig. 1 serves as your master sheet for identifying all the notes (pitches) on basses that have four, five or six strings and up to 24 frets, even though most basses end on the 20th fret. The twelve notes (C is repeated at the end of the row) are, in chromatic order:
C C#/Db D D#/Eb E F F#/Gb G G#/Ab A A#/Bb B C

Fig. 2
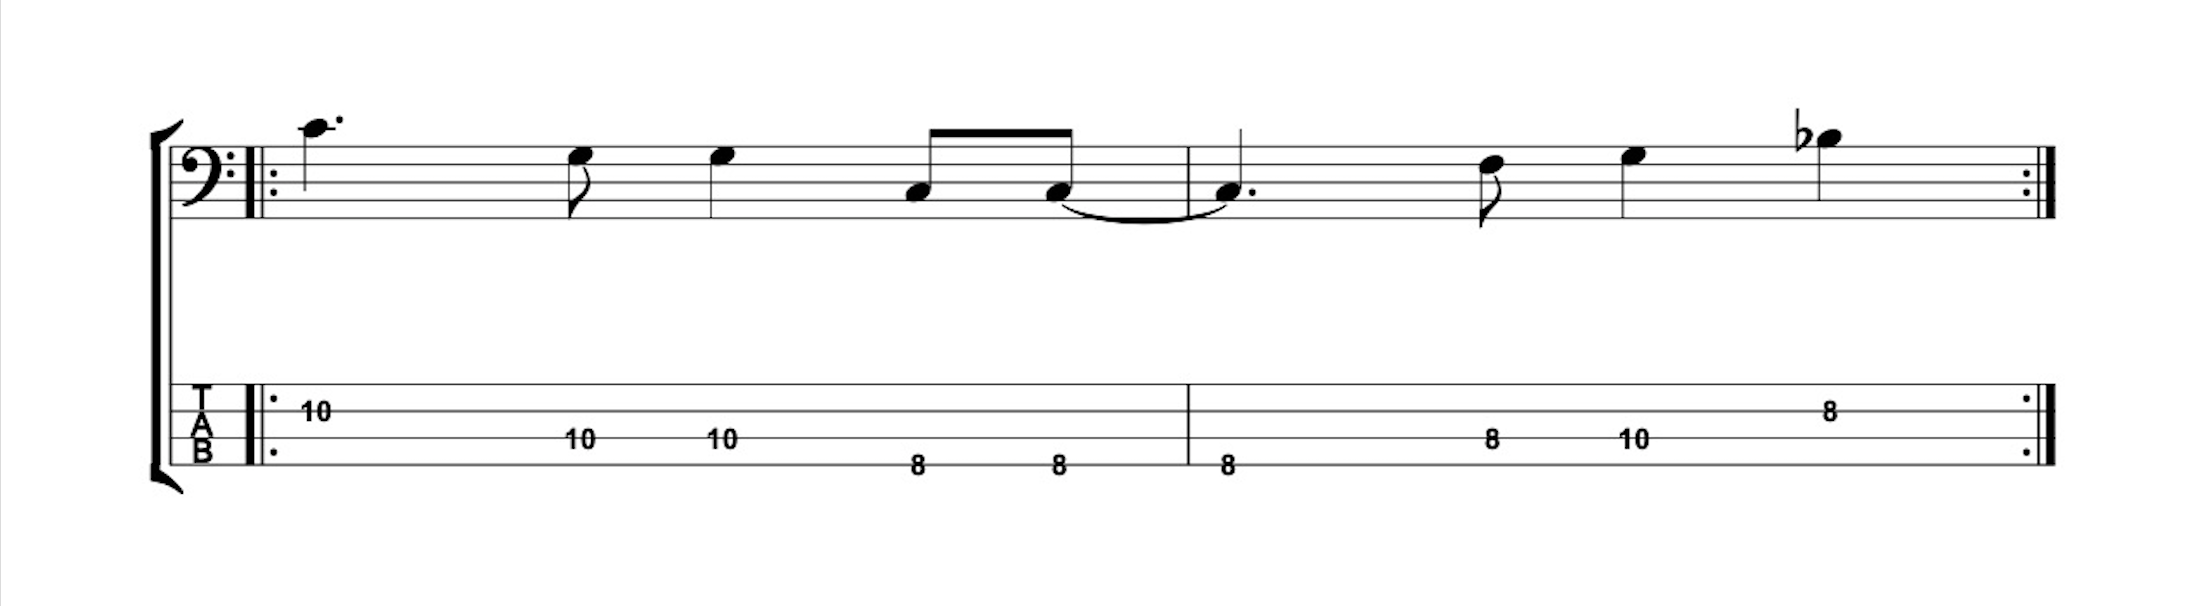
Fig. 3
The groove in Fig. 2 is descending. It starts with the root on the 5th fret of the G string, on the note C. Fig. 3 is the same groove starting on the 10th fret of the D string. Both positions use the same notes, even in the same octave.
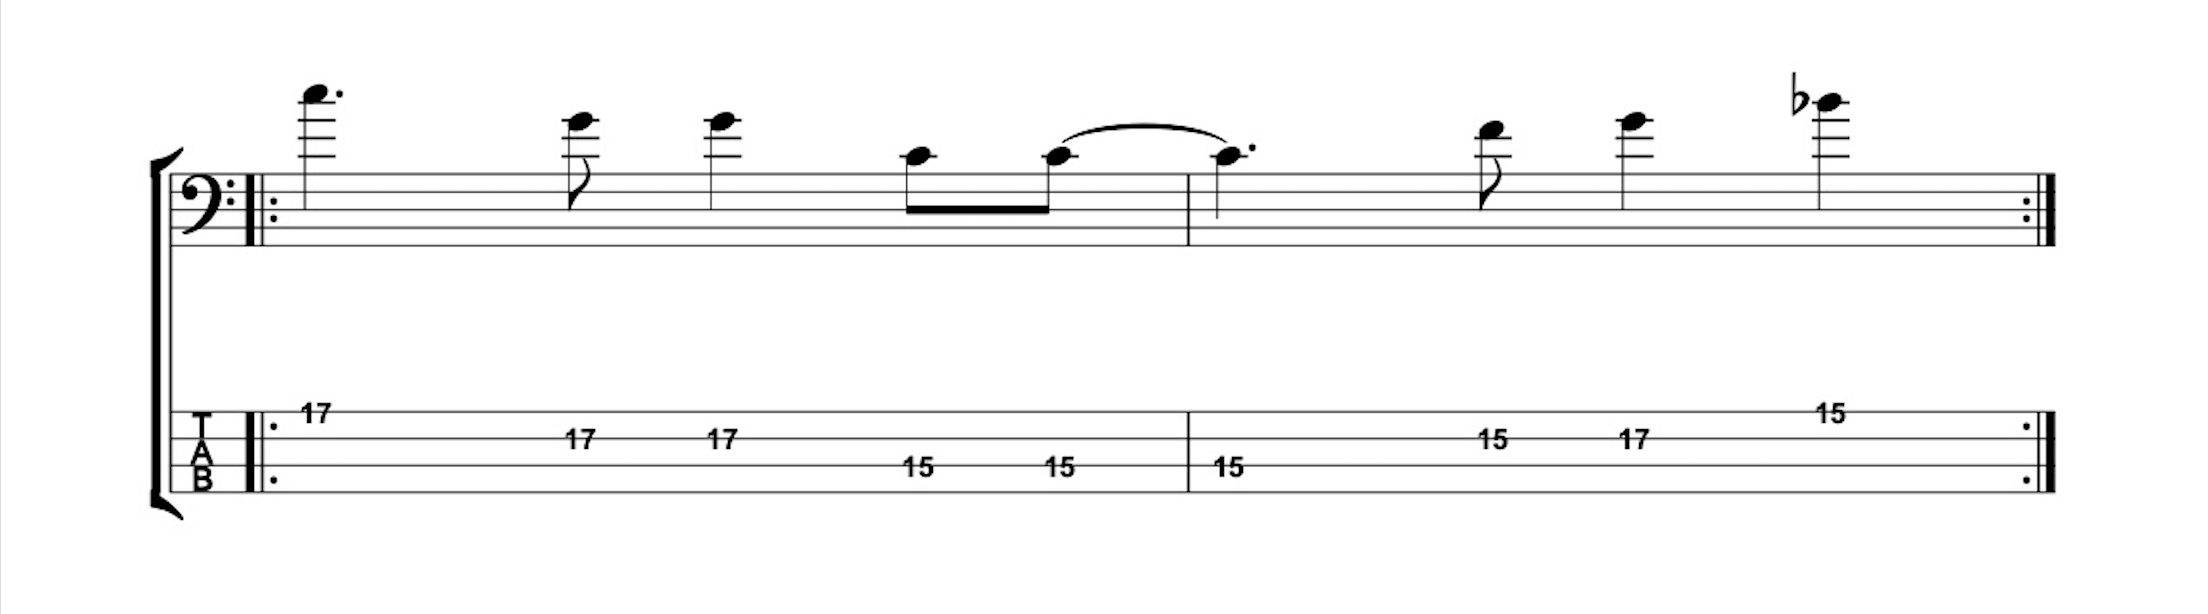
Fig. 4

Fig. 5
Fig. 4 shows the same groove an octave higher, starting on the 17th fret of the G string, while in Fig. 5, the groove starts on the 22nd fret of the D string (which may be a bit high for most basses). All these grooves start on C and use the same notes. You need a range of three strings and two frets in order to complete each. This means you can only start the groove on the G- or D string of a four-string bass, the G-, D- or A string of a five-string bass or the C-, G-, D- or A string of a six-string bass.

Fig. 6
Once you have a good handle on the groove, it’s time to use it in an effective practice routine for finding all the notes on your neck. Fig. 6 gives you the starting points for each root of this descending groove. Remember, you need three strings to play it, therefore you can’t start on the bottom two strings. Play the first groove beginning on the 5th fret of the G string. Without interrupting the groove, look for another C to move your groove to (hang on the first groove for as long as it takes to find that new C). You can see there is a C on the 10th fret of the D string. Shift your hand as seamlessly as possible to this new C and continue playing the groove without interruption. Now you’re playing your groove with the root located on the 10th fret of the D string. While playing, scan for another C to move this groove to. You find one on the 17th fret of the G string. Seamlessly shift your groove to this new position and keep playing. Now, while continuing to play, search for yet another C. There is one on the 22nd fret of the D string, which is probably a little too high for most basses.
Playing continuously while you’re finding new starting points for your groove simulates a real-life situation. When you’re on the bandstand and you’re getting ready to move to a new note, you can’t just stop to figure out where you’re going.
Once you’ve explored all the available starting pitches beginning on C, move on to F. You can start on the 3rd fret of the D string, move to the 10th fret of the G string, and then back to the D string at the 15th fret, and if you have the room, take another F all the way up on the 22nd fret of the G string while happily grooving along. After F, follow up with A#/Bb and just keep on going through the notes until you end at G. You now have played the groove in all twelve keys and in all available positions…awesome!
Remember that to play this groove, you need a range of two frets below the root, so don’t start it lower than the second fret, which means you can use the open string for the lower octave (as in the case of A, which starts on the 2nd fret of the G string).
This is a truly serious workout. Spread it over the course of several days or even a week if you like (at two pitches per day it takes six days to play all twelve keys). I promise you, the results are truly amazing and will allow you to reach an entirely new level of mastery.
Until next month, love, light and low frequencies to you!